
Lateral Marks
Lateral Marks – Port & Starboard
There are four different buoys in the Lateral Marks category. These are port and starboard marks. Red port cans on the port side (left side) and green starboard cones on the starboard side (right side) indicate the limits of a channel. They are placed so that red is on the left as you are entering a harbour from the open sea.
The magenta symbol at the bottom indicates the direction of buoyage. You will find this symbol on navigational charts.

Preferred Channel Marks
The other two types of buoy in this category are preferred channel marks. These denote the main thoroughfare or route through a harbour when it is not immediately obvious. Take a look at the diagram of a channel below:
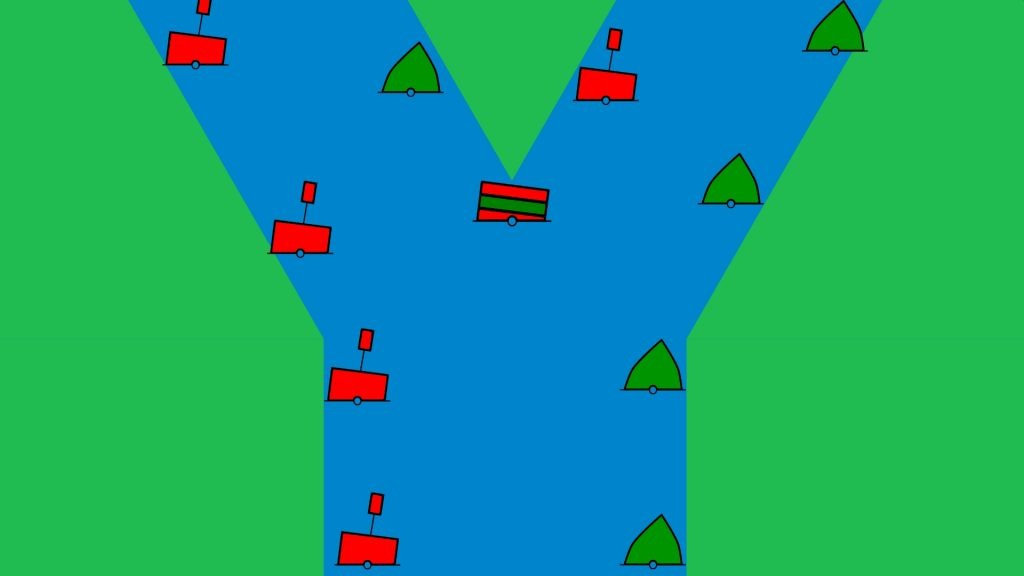
As expected, we can see red port cans on the left of the channels and green starboard cones on the right of the channels.
Where the channel forks though it wouldn’t be immediately obvious to a skipper or captain of a vessel which way they should go. The preferred channel mark (red with the green stripe) is directing vessels to starboard.
A way to remember this is as follows. The preferred channel mark in the diagram is a red buoy. It just has a green stripe on it too. Red buoys go on the port side of the channel so we should keep it on the port side of our vessel.
Importantly, these are preferred channel marks which denote the main thoroughfare. We can go to the other side of them but we will be going into something. That may be an anchorage, a marina or a boatyard etc.
So what if the preferred channel is to port? Take a look at the next image:

Here’s the same channel except this time it has a preferred channel to port mark. Remember, it is still a green starboard cone, which we leave on the starboard side of our vessel.
Lights for lateral marks
Lights for port and starboard marks are red and green respectively. Red lights for port buoys and green lights for starboard buoys. They can be almost any rhythm or pattern as well.
For example, the could flash once every 5 seconds, or twice every 6 seconds etc. Whatever the pattern, you will see these written on the chart next to the chart symbols.
Fl 2 R 10s would mean flashing 2 red lights in every 10 second period
QR would mean a quick red light
Fl 3 G 5s would mean flashing 3 green lights in every 5 second period.
As mentioned earlier these lights can be almost any pattern. The one pattern that they can’t flash is known as 2+1.
This pattern of 2 flashes, then a pause, followed by one flash is reserved for preferred channel marks.
A preferred channel to starboard mark is red with a green stripe on it. As it is predominately a red buoy, it flashes with a red light. Rhythm 2+1.
A preferred channel to port mark is a green buoy with a red stripe on it. Therefore it flashes with a green light. Rhythm 2+1.