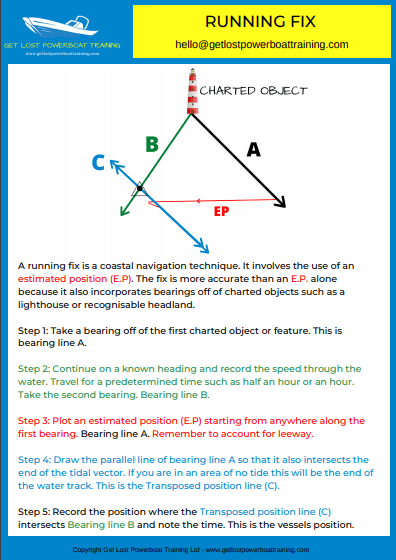
A running fix is a method of coastal navigation position fixing. It incorporates the use of an estimated position along with bearings off of charted objects. Using bearings as well as an E.P makes this more accurate than an E.P alone.
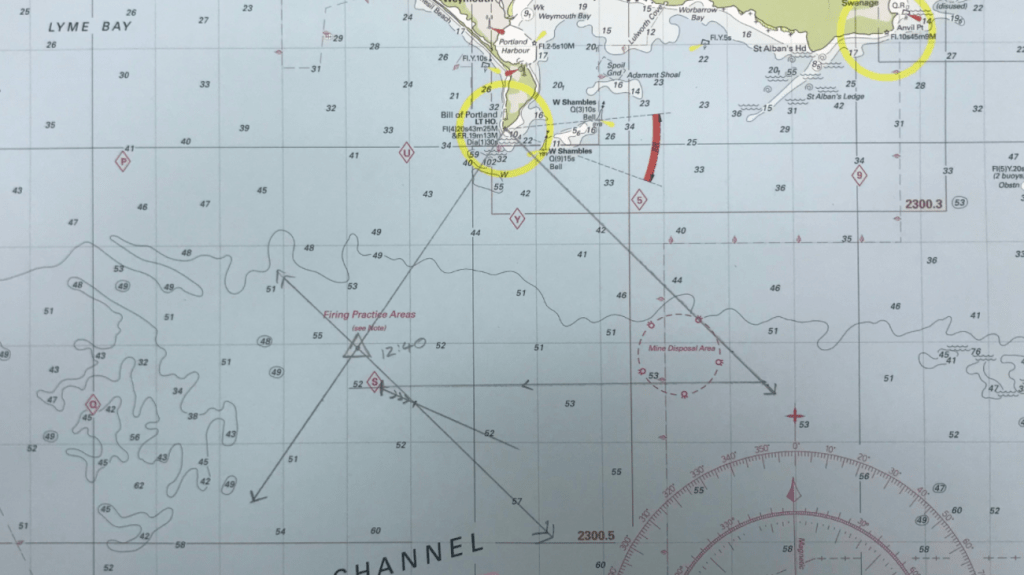
Take a look at this example of a running fix that was plotted while on passage past Portland on the UK’s south coast. The yacht was on passage making it’s way west towards Dartmouth.
How to Plot a Running Fix
Although is looks complicated the running fix is surprisingly straight forward to plot. The first thing to do is identify some objects or features on the coast that can be clearly identified on the chart. In this case we used the lighthouse on Portland Bill.
We are going to need to take two bearings to charted objects for the running fix. The bearings can either be off the same object or off of two different objects. The process is the same.
Step 1 – The first bearing
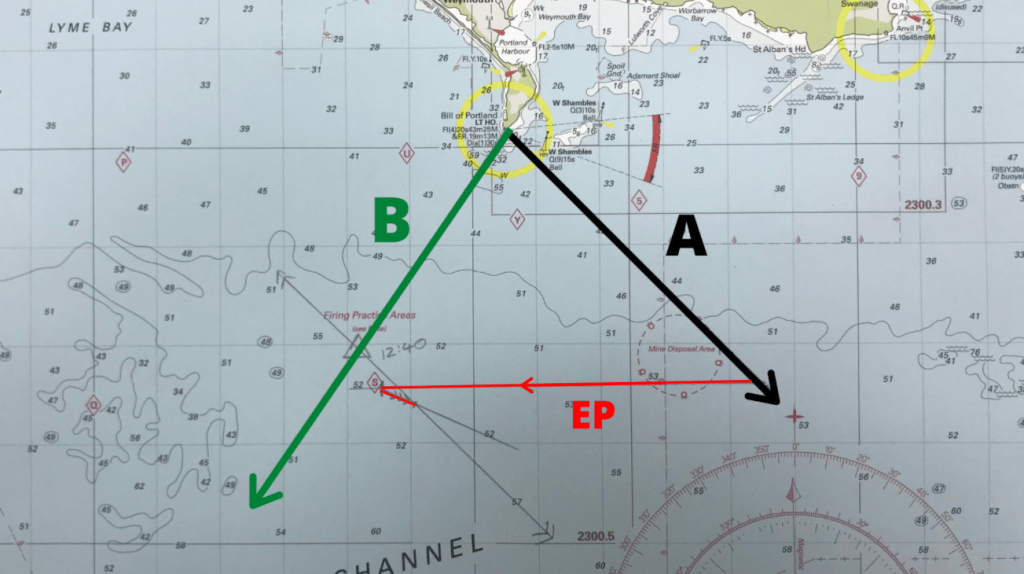
After you have chosen your objects or features you need to take a bearing to the first one. This is shown below as bearing line A.
From a navigation perspective all we can tell from this first bearing is that we are somewhere on that line.
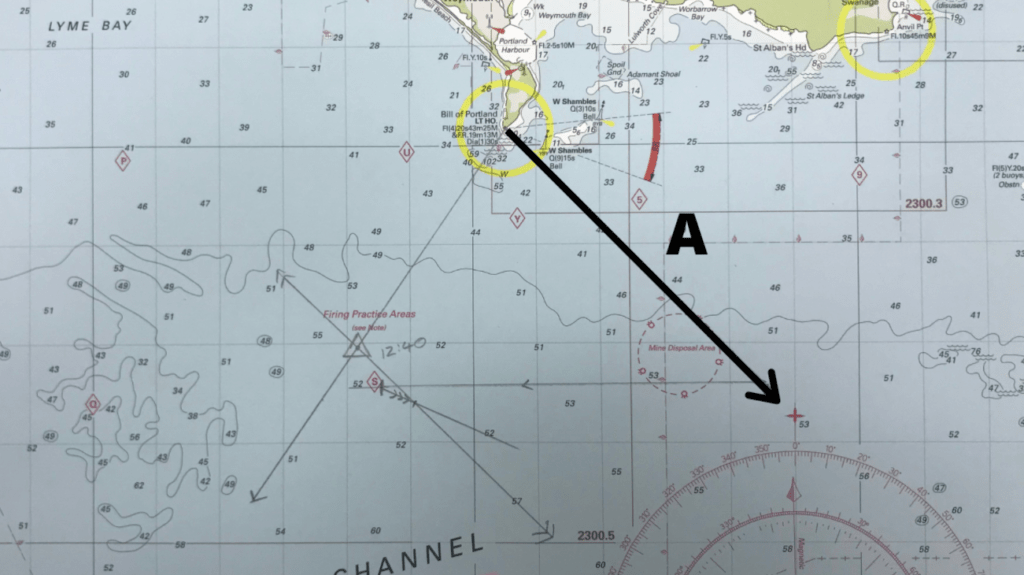
Step 2 – The second bearing
We now need to continue on our passage and make a note of the information we require to plot an estimated position later on.
First, we need to decide on a length of time for the journey’s E.P. Either half an hour or an hour keeps things simple. This is so we can plot the correct tidal vector.
We will also need to note the ships heading, any leeway and our speed through the water.
After we have travelled the decided amount of time we need to take the second bearing. Shown below as bearing line B.
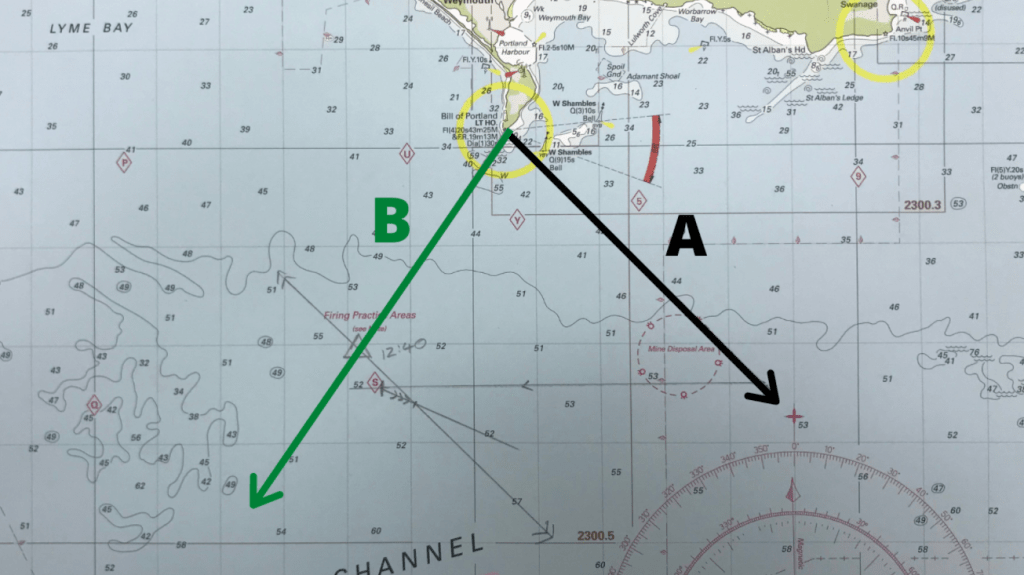
Step 3 – Plot the estimated position
Now we have our two bearings on the chart we need to plot the water track and tidal vector of the estimated position. We need to decide where we started from though in order to plot an E.P though. Right?
All we know is that we started somewhere on bearing line A. So we can start the E.P from anywhere on bearing line A! So we plotted the E.P as shown below in red.
If you can’t remember how to plot an E.P for the running fix check out this article that explains how to do it: HERE
Step 4 – Transpose the position line
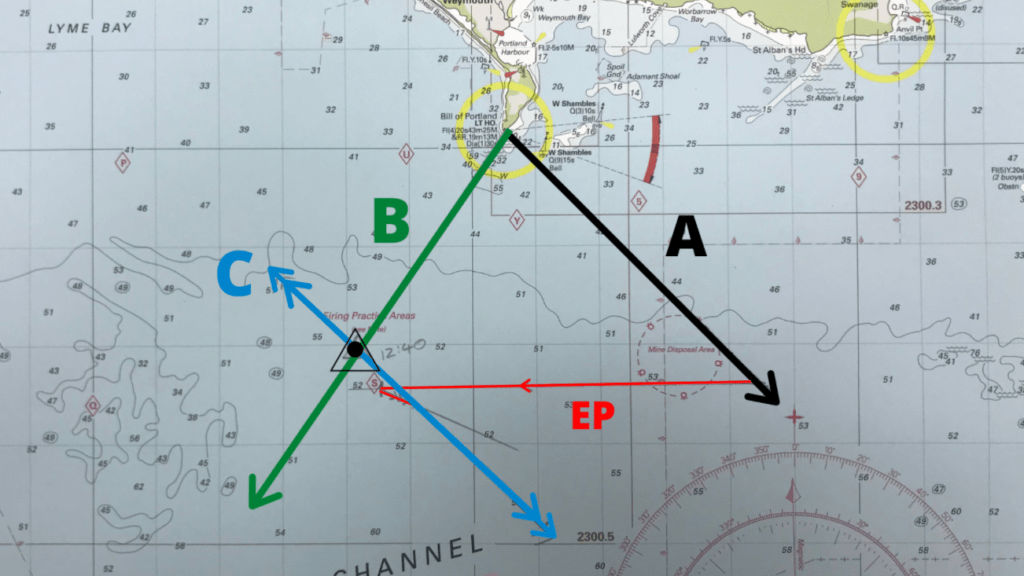
We are almost there. We now need to transpose the position line. In order to this we simply draw a parallel line to bearing line A so that it intersect the end of the tidal vector. This is shown as line C below.

The position of the vessel is where the transposed position line intersects the second bearing line. Mark this with and E.P symbol and note the time of the fix on the chart.
It really works
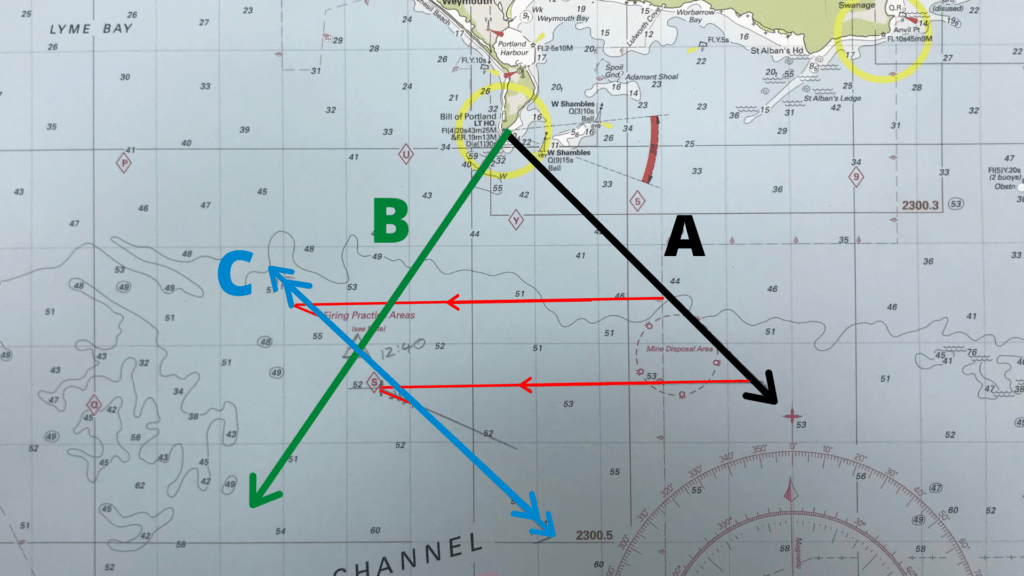
Take a look at this image that shows it doesn’t matter where we start the E.P from. The transposed position line will still intersect the same place.
Running Fix Video Tutorial
Click the link below to subscribe to our channel to get all our videos as we publish them
Our complete set of Knowledge Cards are available from our shop
-
 Skippers Knowledge Cards£19.99
Free Cheat Sheet to Download